How to Choose the Right Knotting Unit Body?
Choosing the right Knotting unit body is a practical engineering decision, not a simple catalogue exercise. The body must match the machine frame, yarn path, knotter head, drive system, and working environment. A small mismatch can create vibration, uneven tension, frequent stops, and expensive maintenance.
Dr. R. Chattopadhyay, a respected textile machinery researcher, offers a useful principle: “Machine selection must follow the production requirement, not the attraction of a specification.” This idea matters when comparing cast iron, aluminium, and reinforced composite bodies. Each material affects stiffness, weight, heat response, corrosion resistance, and service life. The best choice depends on yarn type, operating speed, factory humidity, and expected production hours.
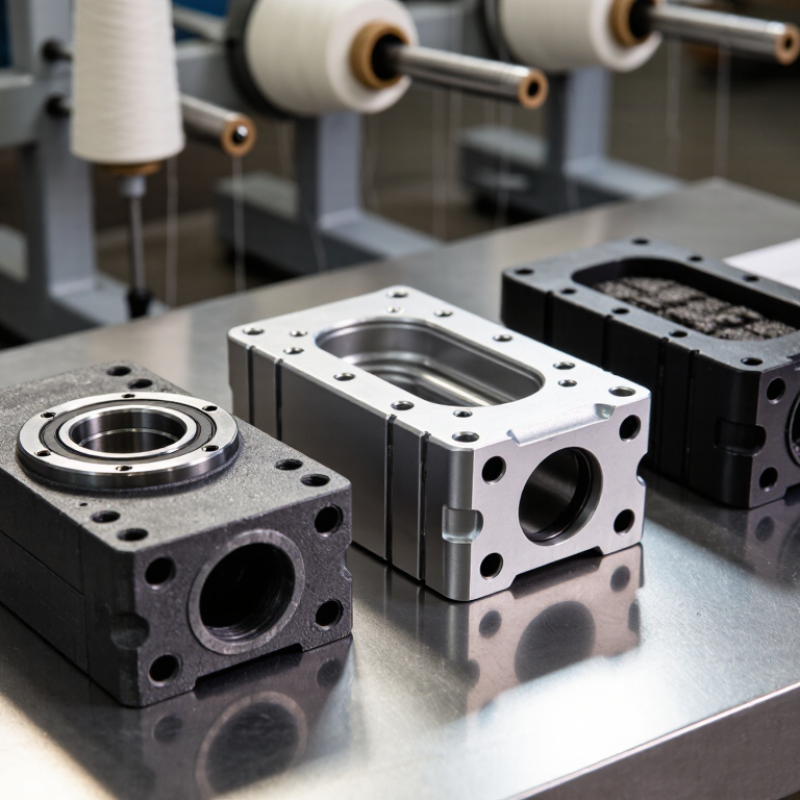
Look closely at the details.
Experienced technicians usually inspect mounting holes, bearing seats, inspection access, and surface finish before approving a Knotting Unit Body. They also check dimensional drawings against the existing assembly. Manufacturer certificates, material data, tolerance records, and warranty terms can support a reliable decision. However, paperwork alone is not enough. A body may meet the stated dimensions yet perform poorly under continuous vibration.
This is where selection becomes less certain. A lighter body may simplify installation, but it can reduce stability in demanding applications. A stronger body may last longer, but it can increase cost and complicate replacement. Trial fitting, controlled testing, and feedback from operators remain valuable. Sometimes, the overlooked practical detail matters most: tool clearance, cleaning space, or access to a worn knotting component.
Define the Role and Working Conditions of the Knotting Unit Body
The knotting unit body should be selected by its role, not by appearance. It supports the knotting mechanism, guides yarn, protects moving parts, and transfers vibration to the machine frame. Define the production task first. A body for frequent knot joining needs fast access, stable alignment, and simple cleaning. A body for continuous operation needs stronger bearings, controlled heat dissipation, and reliable sealing around dusty areas.
Working conditions decide the material and structure. Record yarn type, tension range, cycle frequency, ambient temperature, humidity, lint level, and operator access. For example, a dusty spinning room may require enclosed surfaces and removable inspection covers. A high-speed line may need reinforced mounting points and lower vibration. The International Labour Organization reported 2.93 million work-related deaths and 395 million non-fatal injuries globally in 2023. This supports careful guarding, safe service access, and reduced manual intervention around moving assemblies.
Industry data also shows why operating assumptions matter. The International Textile Machinery Federation’s machinery shipment statistics indicate continuing investment in automated textile equipment, although demand varies by machine category and market. More automation does not automatically mean better performance. Poor alignment, heat buildup, or difficult cleaning can still create stoppages. I would test the body under real yarn tension, not only on a workbench. That is imperfect, but useful. Measure vibration after warm-up, inspect lint accumulation, and check whether technicians can remove covers without awkward reaching. A compact body may save space, yet a slightly larger design could deliver safer maintenance and longer service life.
How to Choose the Right Knotting Unit Body?
Define the role and working conditions of the knotting unit body by prioritizing the main factors that affect reliability, maintenance, and operating stability in textile production.
The chart uses a practical 1–5 priority scale, where 5 indicates that the condition requires the strongest consideration when selecting the body structure, sealing level, materials, and maintenance access.
Compare Materials, Strength, and Resistance to Wear
How to Choose the Right Knotting Unit Body?
Choosing a knotting unit body starts with its working environment. Material choice affects strength, weight, vibration control, and resistance to wear. Stainless steel handles moisture and repeated impact well. It suits demanding equipment exposed to dust, humidity, or frequent cleaning. Aluminum reduces moving weight, but it may dent under sharp impact. Reinforced composite materials can resist corrosion and lower noise. However, their long-term performance depends heavily on fiber quality and production control.
Strength alone does not guarantee reliable service. A rigid body can still fail if stress concentrates around bolt holes or narrow corners. Inspect these areas carefully. During maintenance checks, look for polishing marks, grooves, loose fasteners, and small cracks near moving parts. Abrasive dust can slowly enlarge a bearing seat, even when the outer surface looks clean. Wear-resistant coatings may extend service life, but poor surface preparation can cause early peeling. That detail is easy to miss.
Match the body material with the actual load cycle, not an ideal laboratory condition. Consider impact frequency, operating speed, lubrication, temperature, and cleaning methods. A thicker body may provide more strength, yet it can increase machine resistance and reduce efficiency. I have seen selections focus too much on hardness and overlook alignment. That was a costly assumption. Request material specifications, hardness data, dimensional tolerances, and wear-test results before approval. Field samples should also be checked after extended operation, because real dust and vibration often expose weaknesses that drawings cannot show.
Match Body Dimensions with Machine and Production Requirements
How to Choose the Right Knotting Unit Body?
The knotting unit body should match both the machine frame and the planned production rate. Measure available width, height, and mounting depth before comparing models. A body that is too large may restrict access to guides, sensors, and tension controls. A body that is too small can create tight routing paths and uneven thread movement. Check shaft alignment carefully. Even a small offset may increase vibration during continuous operation.
Review the machine’s speed, material thickness, and knotting cycle. Production teams should also consider cleaning space and tool access. These details affect daily uptime more than a catalog dimension. In a dusty workshop, removable covers and open service zones can reduce maintenance delays. For higher output, confirm that the body can handle repeated motion without excessive heat or loosened fasteners. Ask a qualified supplier for dimensional drawings, load data, and tolerance information. Measurements on the floor often reveal problems that a screen does not.
Tips: Leave service clearance around the body. Measure twice. Test the unit at normal speed, not only during a short trial. Record vibration, thread tension, and access time. Fit matters. It is easy to focus on maximum output and overlook operator comfort. That choice may need reconsideration after several long shifts. A practical fit is usually better than the largest available body.
Evaluate Maintenance Access, Compatibility, and Replacement Needs
Choosing the right knotting unit body begins with maintenance access, not catalog appearance. During field inspections, technicians need clear sightlines and comfortable hand clearance. A cramped frame can turn a ten-minute adjustment into an hour. Look for removable guards, reachable fasteners, and simple cleaning routes. Small details matter. Ask whether a technician can inspect and retension parts without dismantling adjacent equipment. This question often exposes design weaknesses early.
Compatibility requires more than matching bolt holes. Verify the yarn path, drive speed, sensor signals, mounting dimensions, and operating load. Review service manuals beside actual machine drawings. A unit may fit physically yet fail during acceleration. Check lubrication points and adjustment ranges. If the existing control system is old, confirm signal behavior before purchase. I have seen projects delayed by one overlooked connector. That mistake was avoidable. Still, assumptions deserve a second check because drawings can be outdated.
Replacement planning should include wear parts, lead times, and technician training. Identify knives, springs, bearings, guides, and fasteners before installation. Store critical spares in labeled containers, not an unmarked box. Request exploded views and replacement procedures from the equipment provider. Test access with the machine safely stopped. A short trial can reveal awkward tools or poor visibility. Do not judge the body only by its purchase price. A cheaper unit may demand more labor each month. I would record the first three service visits. Those notes may challenge the original choice, but they provide stronger evidence for the next replacement.
Confirm Quality Standards, Supplier Support, and Total Cost
How to Choose the Right Knotting Unit Body?
Quality standards should guide the first inspection, not a low purchase price. Ask for material certificates, dimensional tolerances, and documented testing procedures. Check the body for smooth surfaces, accurate mounting holes, and consistent thread quality. These details affect alignment and downtime. A useful supplier should explain each test clearly. Vague answers deserve a second look. I once saw a unit pass a basic visual check but fail after repeated operation. The mounting threads were slightly misaligned.
Supplier support matters during installation and maintenance. Request clear drawings, spare-part lists, and response times in writing. Confirm whether technicians can provide remote guidance or practical troubleshooting. Ask how quickly replacement parts usually arrive. A reliable supplier should discuss common failures without hiding inconvenient details. Small issues become expensive when nobody answers.
Calculate total cost across the unit’s working life. Include installation, training, energy use, lubrication, spare parts, inspections, and unexpected stoppages. A cheaper body may require frequent adjustment or specialized tools. That difference can exceed the original saving. Compare at least three written quotations with identical specifications. Do not compare prices alone. I would also allow a small contingency budget, because real production rarely follows the spreadsheet perfectly. That assumption may be uncomfortable, but ignoring it is riskier.